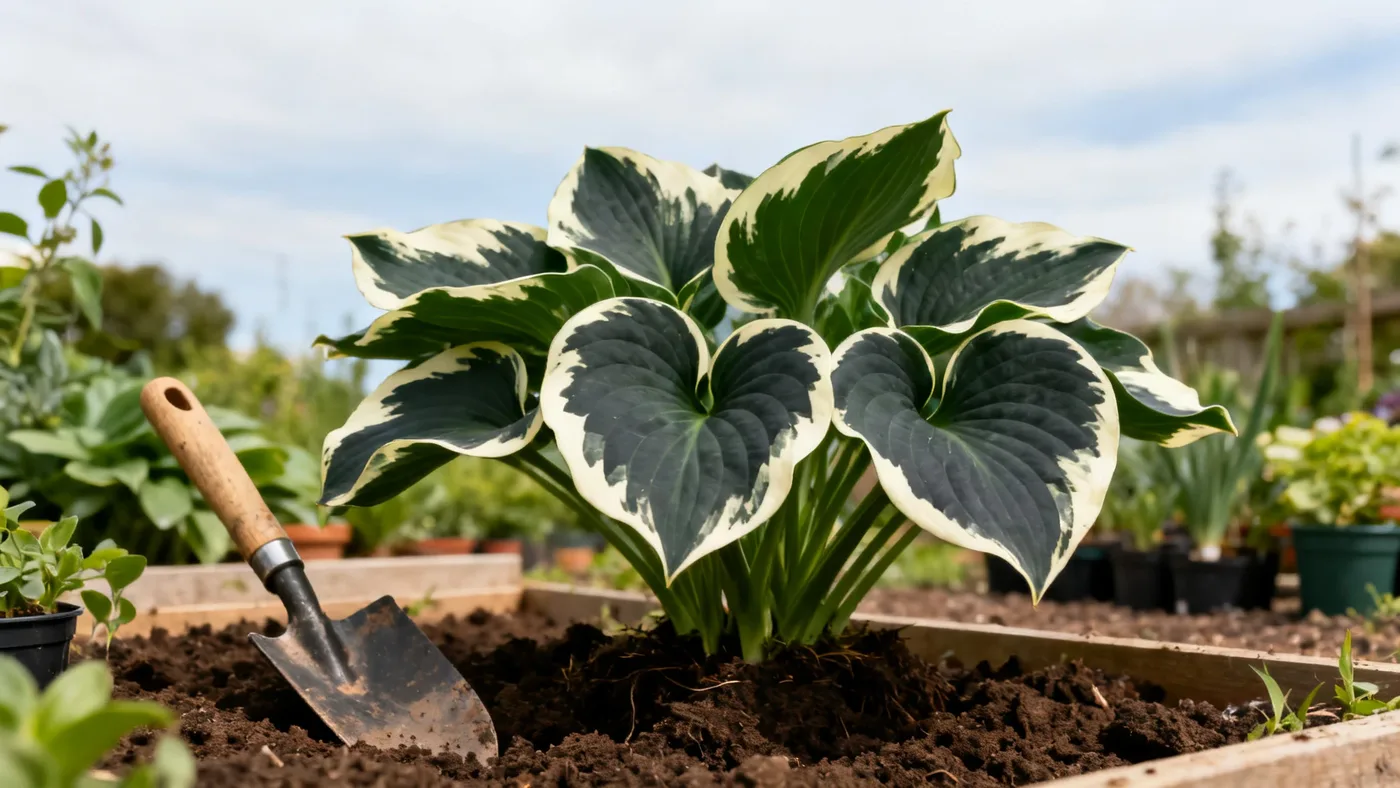
How to Plant Plantation Lily: Site, Timing and First Weeks
Plantation Lily (Hosta 'Patriot') is a low-maintenance shade perennial with distinctive dark green foliage and creamy-white margins. If you've got a shaded corner that needs coverage, or you want to fill a spot under trees, this plant delivers reliable color and texture year after year. Planting one is straightforward, but getting the site, timing, and early care right sets up your plant for decades of good growth.
When to Plant Plantation Lily
Plantation Lily is best planted in spring or early fall. Both seasons give the plant time to establish roots before the stress of summer heat or winter cold.
Spring planting (April through May in most zones) works well because the soil warms up and natural rainfall is often consistent. The plant has the whole growing season ahead to settle in.
Early fall planting (August through September) is equally good. The cooler air slows top growth, but the roots work steadily in warm soil. By the time winter dormancy arrives, your new plant has already sent down a good root system.
Avoid planting Plantation Lily in high summer or late fall. Hot, dry spells stress young plants, and late plantings may not root in before hard frost.
Choosing the Right Site
Plantation Lily thrives in part shade to full shade. Full shade (under a dense tree canopy or on the north side of a building) is ideal in most climates. In cooler zones 3 and 4, it tolerates more morning sun. If you live in a hot region, afternoon shade is essential to prevent leaf scorch on the creamy-white margins.
Assess your site before digging. Walk through at different times of day. Does the area stay dark most of the day, or does direct sun hit it for several hours? If you're in doubt, part shade (dappled light, morning sun with afternoon shade) is your safest choice.
Avoid planting Plantation Lily where water pools after rain or where the soil stays soggy. The plant needs consistent moisture, not waterlogged roots. If your spot drains poorly, consider raising the bed or amending the soil with compost and coarse sand before planting.
Site Preparation and Soil
Plantation Lily prefers rich, humus-heavy, well-drained loam with a soil pH between 6.0 and 7.0 (slightly acidic to neutral). Most garden soils can be amended to suit.
Before planting, dig out an area roughly 18 inches across and 12 inches deep. Remove any grass, weeds, or old roots. Break up the native soil at the bottom of the hole.
Mix the removed soil with compost or aged bark, at a ratio of about one part compost to two parts native soil. If your soil is clay-heavy, add coarse sand or perlite to improve drainage. If it's very sandy, add extra compost to boost water retention.
Do not use fresh manure or fertilizer in the planting hole. These can burn roots. A light dusting of balanced, slow-release fertilizer mixed into the amended soil is optional, but compost alone is usually enough.
What You'll Need
- Plantation Lily plant in a quart or #1 container (typically 12 to 18 inches tall at purchase)
- Spade or garden fork
- Compost or aged bark
- Coarse sand or perlite (if soil is clay-heavy)
- Slow-release balanced fertilizer (optional)
- Watering can or hose
- Mulch (shredded bark or wood chips)
- Work gloves
- Tape measure (to check spacing)
Step-by-Step Planting Instructions
1. Prepare the planting hole
Dig a hole about 18 inches across and 12 inches deep. The hole should be roughly twice as wide as the root ball of your plant, but no deeper. A hole that is too deep can cause settling and crown rot.
2. Amend the soil
Mix the removed soil with one-third to one-half its volume in compost. Stir in sand if drainage is poor. Add a light application of slow-release fertilizer if desired. Fill the hole halfway with this amended mix.
3. Remove the plant from its container
Water the plant thoroughly a few hours before planting. Turn the container on its side and gently slide or tip the plant out. If roots are tightly wound around the ball, loosen them gently with your fingers. Do not yank at the foliage.
4. Set the plant at the correct depth
Place the root ball in the hole so that the top of the soil in the container is level with the surrounding ground. The crown (the point where the roots meet the foliage) should sit right at soil level, not buried. Burying the crown increases the risk of rot.
5. Backfill and settle the soil
Fill the hole with the remaining amended soil, gently firming it as you go. Do not pack it hard. Leave a slight depression around the plant to hold water, but do not create a basin that will trap standing water in heavy rain.
6. Water thoroughly
Water the plant deeply right after planting, until the soil is moist 6 inches down. This settles the soil and removes air pockets around the roots.
7. Apply mulch
Spread 2 to 3 inches of shredded bark or wood chips over the root zone, keeping mulch 2 inches away from the crown. Mulch helps retain moisture and keeps the soil cool, which Plantation Lily appreciates in warm regions.
Spacing Multiple Plants
If you are planting a drift or mass planting of Plantation Lily, space plants 24 to 36 inches apart, center to center. At this spacing, the plants will touch and form a solid ground cover within 3 to 4 years as they reach their full mature width of 24 to 36 inches. Closer spacing fills the area faster but may feel crowded early on. Wider spacing takes longer to fill but looks less dense in year one.
First Weeks Care
The first two to three weeks after planting are critical for establishment. During this window, the plant is developing new roots and is sensitive to drought and temperature swings.
Watering
Water the plant twice a week if there is no rain. Each watering should be deep enough to moisten the soil 6 inches down. Once the plant shows new growth (usually within two to three weeks), you can drop back to once a week unless the weather is hot and dry.
Plantation Lily needs about 1 inch of water per week from rain or irrigation. During sandy soils or heat spells, this may increase. Use a rain gauge to track natural rainfall, and water if the total falls short.
Monitoring
Check the soil moisture every two to three days by pressing a finger 2 inches into the soil. It should feel consistently damp but not soggy. If the foliage begins to droop or the leaf edges turn brown, increase watering frequency.
Fertilizing
Do not fertilize immediately after planting. Wait until the plant shows vigorous new growth, usually four to six weeks in. At that point, a light application of balanced slow-release fertilizer can support growth, but it is not necessary if you amended the soil with generous compost.
Pests and diseases in early weeks
Watch for slugs and snails, which can chew ragged holes in the leaves. If you see damage, hand-pick pests in the early morning or evening, or apply copper tape or food-grade diatomaceous earth around the base of the plant. Deer may browse young plants, so if deer are common in your area, consider protective fencing or a deer repellent spray.
Crown rot can occur if the crown stays too wet. Ensure the planting site drains well and that you did not bury the crown. If the center of the plant turns soft or smells bad, the plant is likely beyond saving.
What to Expect: A Timeline
Week 1 to 2: The plant may look slightly wilted as it adjusts to the new site. This is normal. Continue to water as directed.
Week 2 to 4: New growth emerges from the crown. Leaf size and color should begin to stabilize. The plant begins to establish roots.
Month 2 to 3: The plant gains size and vitality. Roots extend deeper into the surrounding soil. Watering can shift from twice-weekly to once-weekly if rainfall is adequate.
Year 1 to 2: The clump slowly expands, gaining roughly 2 to 4 inches in diameter per year. Flowers typically appear in the second or third growing season, usually mid to late summer, in pale lavender to near-white.
Year 3 to 4: The plant reaches its full mature height of 18 to 24 inches and width of 24 to 36 inches. At this point, it becomes a stable, long-lived perennial that can thrive for 20 years or more with occasional division.
Tips and Common Mistakes to Avoid
Planting too deep: The crown must sit at or just above soil level. Buried crowns rot. If in doubt, plant slightly high and let the soil settle.
Overwatering in wet seasons: Plantation Lily does not tolerate standing water. In years with heavy rainfall, check the drainage around your plant. If water pools, you may need to move the plant or amend the drainage.
Choosing a sunny site: Full sun (more than 6 hours) often causes leaf scorch, especially on the white variegation. If your site is very sunny, plant in a location that gets afternoon shade or filtered light from tree branches.
Skipping the compost: Plantation Lily is a shade plant in nature and evolved in rich forest soils. Amending with compost is worth the effort. It improves both drainage and water retention.
Planting in spring and neglecting water in June: Spring plantings are prone to drought stress if you assume rain will handle everything. In your first summer, be prepared to supplement if dry spells occur.
Failing to space plants far enough apart: Cramping Plantation Lily leads to poor air circulation, increased slug and disease pressure, and slower overall growth. Stick to the 24 to 36-inch spacing even if the bed looks sparse in year one.
Container Planting
Plantation Lily thrives in containers if you provide a large pot (at least 18 inches across) with drainage holes and rich, well-draining potting soil. The pot should be wide enough to accommodate the plant's mature width of 24 to 36 inches or kept to a smaller cultivar if space is limited. Water containers more frequently than in-ground plants, as potting soil dries faster. In zones 3 and 4, move containers to a sheltered location or mulch heavily in late fall to protect roots from extreme cold.
Quick Reference: Planting Checklist
| Task | Timing | Details |
|---|---|---|
| Choose planting season | Spring or early fall | Avoid summer heat and late fall |
| Select site | Before digging | Part shade to full shade; afternoon shade in hot zones; no standing water |
| Prepare hole and amend soil | Day of planting | 18 in wide x 12 in deep; mix soil with 1/3 to 1/2 volume compost |
| Plant at correct depth | Day of planting | Crown sits at or just above soil level |
| Water thoroughly | Immediately after planting | Moisten soil 6 in deep |
| Apply mulch | Day of planting | 2 to 3 in layer, 2 in away from crown |
| First-week watering | Weeks 1-3 | Twice weekly unless rain occurs; keep soil consistently moist |
| Monitor growth | Weeks 2-4 | New foliage emerges; shift to weekly watering once established |
| Space multiple plants | At planting | 24 to 36 in apart, center to center |
| Watch for pests | Ongoing | Slugs, snails, and deer; hand-pick or use deterrents |
Next Steps: Ongoing Care
Once your Plantation Lily is established, maintenance is minimal. For detailed guidance on seasonal care, pruning, fertilizing, and problem-solving as your plant matures, see our complete growing guide at Plantation Lily Care: The Complete Growing Guide.
In most cases, your plant will need little beyond consistent moisture and annual mulch renewal. In 3 to 4 years, when the clump becomes large and dense, you can divide it to propagate new plants or rejuvenate the original. Until then, enjoy the foliage color and the reliable, trouble-free growth that makes Plantation Lily a favorite in shade gardens.